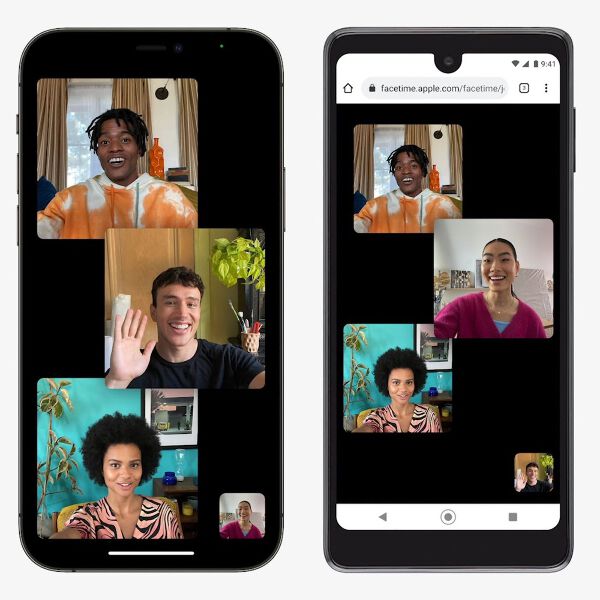
2021 is the year of video conferencing apps. Unlike the newly elevated video call apps such as Zoom and Microsoft Team, FaceTime has been a widely popular app for iPhone and Mac users for quite some time. It has an established user base and good popular culture brand recognition.
Making video group calls on FaceTime is fun. But how to make a FaceTime screenshot? It doesn’t seem to be as easy as one might think. There are extra limitations put by Apple to make FaceTime screenshots hard to take. In this article, we would discuss the details and how-tos in several aspects.
- Part 1. Taking FaceTime Screenshots on iPhone
- Part 2. FaceTime Screenshots on Android – Is It Possible?
- Part 3. Secret Way to Make FaceTime Screenshots (Suggested)
- Part 4. FAQs about Taking FaceTime Screenshots
Part 1. Take a FaceTime Screenshot on iPhone (iOS 15/14/13 Included)
First things first: Yes. You could definitely take screenshots during a video call. Apple has updated privacy settings for different apps. A lot of the apps which enable such privacy protections are exempted from the default iPhone screenshot features. FaceTime isn’t one of them.
- Connect to a FaceTime video call
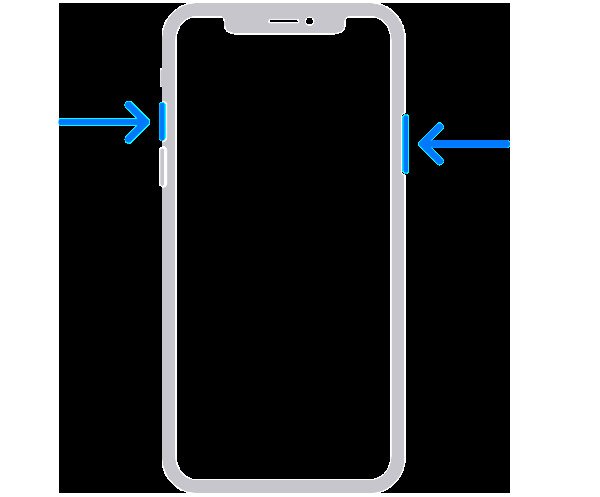
- Hold the Power button on the right edge of your phone and Volume Up on the left simultaneously.
- A FaceTime screenshot would be taken instantly.

Easy task, right? Keep in mind that FaceTime would alert the other entities of your video call that you have taken a screenshot of it. A “Your Name took a FaceTime Photo” notification would appear at the FaceTime live feed for a few seconds, alerting everyone in the group call. For people who are concerned about their privacy and want to avoid the hassle of using an additional smartphone to capture a low-quality photo of the screen, read the passage below. We would demonstrate a much better way of taking FaceTime screenshots
Part 2. Screenshot on FaceTime on Android – Is It Possible?
Short Answer: Yes.
Long Answer: It’s a bit complicated. To take a FaceTime screenshot on Android, you need to click on the link shared by your friends in Chrome App first. This allows you to join a FaceTime video group chat on Android. Then, use any of the following methods to take a FaceTime screenshot on Android:
Method 1. Press the Power and Volume down buttons at the same time. A screenshot would be taken and saved to your phone.
Method 2. If that doesn’t work for you, press and hold the Power button for a few seconds until the Power Menu Controls show up. Tap on the Screenshot option to complete the steps.
Method 3. If neither of the methods works for you, you might read the user guide provided by your specific manufacturer. The detailed steps may vary from device to device.
Note: Unfortunately, there is no way to use FaceTime on Android devices natively despite promises made by Apple’s early ones. However, since the iOS 15 update, Apple has introduced features to (kind of) allowing Android users to use FaceTime within a supported browser. Android users could join FaceTime group chat via a shared link.
Part 3. Secret Way to Make a FaceTime Screenshot on Mac
For people who wish to take a FaceTime screenshot without other parties of the video conference knowing and getting around the warning sign, using a Mac-based application that could handle the task is the best option. It is also a good alternative when you encounter the FaceTime screenshot not saving issue.
Movavi Screen Recorder stands out as the go-to solution for recording and taking screenshots on your Mac. It supports every app on Mac includes FaceTime. It generates perfect results without any quality loss or lagging. By the way, as a professional screen recording application, it also supports:
- Window Lock Feature: Unselected areas are unaffected by recording
- Freehand Selection Tool: Choose the exact recording area flexibly
- No Quality Loss: HQ quality guaranteed for your snapshot
- Audio Recording: Record your FaceTime sound as well.
- Advanced Export: Convert to all popular video formats/codecs
Make a FaceTime Screenshot with the Following Steps:
- To get things ready, you need to open up the FaceTime app on Mac first. Connect to a FaceTime Video Stream.

- Open Movavi Screen Recorder. On the main screen of the program, click on the Snapshot button on the right side of the screen.
- Hover your mouse above the FaceTime app window. Click the area to confirm the window you would like to take a screenshot of.
- Click on the Save button to confirm the screenshot action. No alert would be sent to other members of the FaceTime call.
- A dialog would pop up asking you for the name, save path, and format of your screenshot. Change the default FaceTime screenshot save location if necessary. Click on the Save button to finalize the process.
Part 4. FAQs about taking FaceTime Screenshots
Nope. If you missed the moment that someone has taken a FaceTime screenshot, there is no way to retroactively check whether a screenshot has been taken or not. FaceTime only kept calling logs for users.
For iPhone users, your FaceTime screenshots would appear to your Photos App. For Mac users, FaceTime screenshots would be saved to your Desktop by default.
When you encounter FaceTime live photos not saving or working issue, you can go to 設置 and then find FaceTime. Turn off and then on FaceTime Live Photos. Or you can restart iPhone to solve FaceTime screenshot not working or saving problem.
Making FaceTime group calls with family members and friends could be a lot of fun. If you want to make a FaceTime screenshot during a video call, we have suggested the best way and other possible methods for you to achieve the goal. Whether using professional screen recorder software on Mac or using iPhone’s default key combinations, you must have learned the strength and weaknesses of each method to make your own choice.

